How to Convert Any Image or word excel Documents To PDF On Windows 10
Here how to convert JPEG and PNG image files or word, excel Documents to PDF files without installing any third-party software.

PDFs are one of the most useful file extensions capable of being used read and edited by Windows, Mac OS, iOS, Android, and nearly any other platform. If you are looking for convert image formats like JPG, PNG, TIFF, and more to PDF, Or want to merge multiple images into a single PDF in Windows 10 this post helpful for you.
Here how to convert jpg to pdf or PNG, TIFF to pdf or quickly create a PDF from one or more files in Windows 10 using the built-in Microsoft Print to PDF feature.
‘Microsoft Print to PDF’ allows you to Print to PDF natively. The .pdf file created by Microsoft Print to PDF can be opened by any app that supports this format like, FoxIt Reader, Adobe Reader, Picasa, and others.
How to Convert an Image to PDF
To convert an image to a PDF on Windows 10, do the following:
- Open up the photo in your default image viewer—that could be the Windows 10 Photo app or an editing program like Paint.
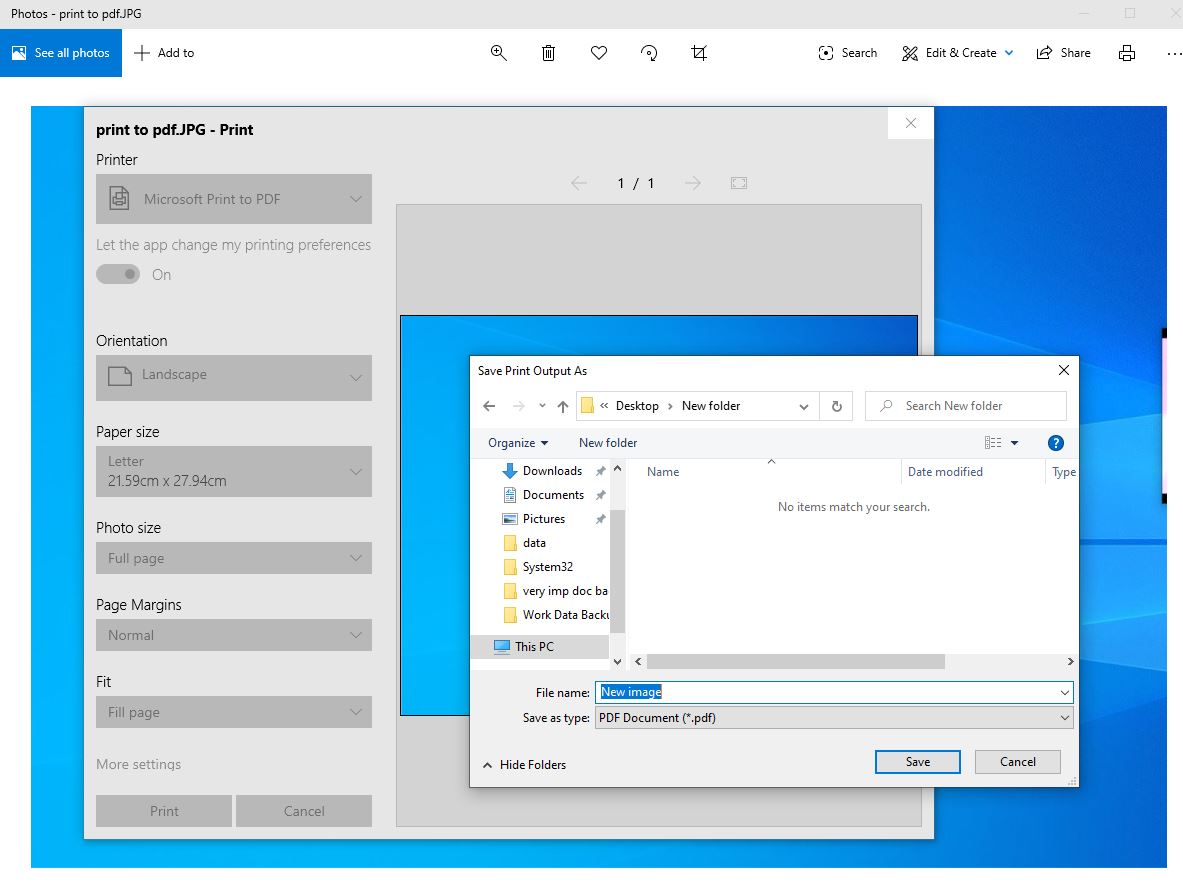
- Once the image has opened, press Ctrl + P to open the Print dialog box.
- Select Microsoft Print to PDF as the printer and click Print.
- Another dialog box will pop up where you can enter the File name and select the file location. Once done, click Save.
This method will work with any image file and with any program (Word, Excel) that supports printing.

Create pdf from multiple images
To combine multiple images into a PDF file in Windows 10 you need to make sure your files are listed in File Explorer in the order you want them to appear in the PDF file. You might have to rename them so they get sorted the way you want.
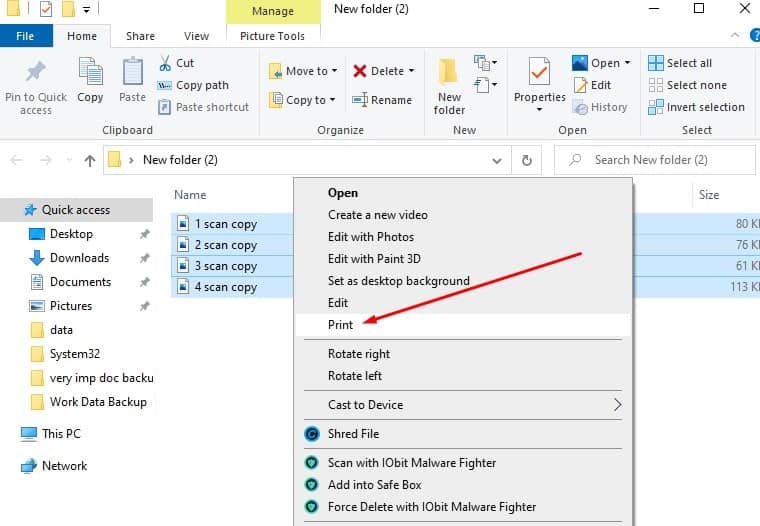
- Select all images (that want to convert into PDF) you can do this using keyboard shortcut ctrl + a or press and hold ctrl key and select images one by one,
- Once done right-click on them Select “Print” from the popup menu.

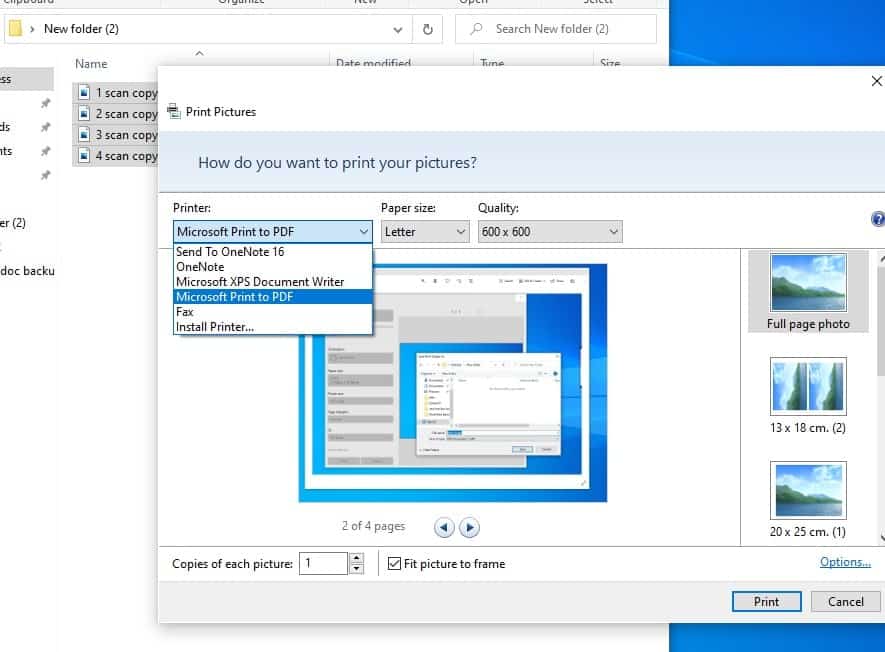
- The Print Pictures dialog box displays Select “Microsoft Print to PDF” from the “Printer” drop-down list.

- Here you can click Options link in the lower-right corner of the dialog box to access additional options for the PDF file.
- Also if you noticed the sides of your images seem to be cut off, click the “Fit picture to frame” checkbox so there is no check mark in the box.
- Once you are ready click “Print” to create your PDF file.
- Save Print Output As dialog box displays Navigate to the location where you want to save the PDF file. Enter a file name for the PDF file and click save.
Microsoft print to pdf not showing/working
If you don’t see Microsoft Print to PDF listed as a printer, you might need to enable the feature.
- Right-click on Start button and select Programs and Features.
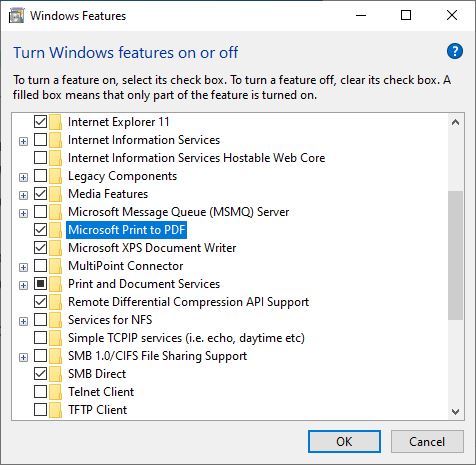
- In the Programs and Features window, click Turn Windows features on or off
- Under Windows Features dialog, uncheck Microsoft Print to PDF and click OK.
- Reboot your PC once.
- Once you reach the desktop screen, reopen the Windows Features dialog, and this time enable the Microsoft Print to PDF checkbox, and click OK.
Now see if Microsoft Print to PDF option shows correctly.

Try to run the in built printer troubleshooter
- Press the ‘Windows key on the keyboard.
- Type troubleshooting in the search box and then press enter.
- Click on view all, this will list all of the in built troubleshooters.
- Click on Printer and follow the onscreen instruction.
Set Microsoft Print to PDF as the default printer
- Press Windows Key + R then type “control printers” (without quotes) and hit Enter to open Devices and Printers.
- Now right-click on Microsoft Print to PDF and then select Set as Default Printer.
- Reboot your PC to save changes and see if you’re able to Fix Microsoft Print to PDF Not Working Issue.
