How to Fix DISM Failed Errors on Windows 10 Effectively 2024

DISM is a Deployment Image Servicing and Management tool that allows administrators to prepare Windows images before deploying to the users. Whenever the system file checker utility fails to restore missing corrupted system files we recommend to run to DISM restore health command. That helps repair system image and enable SFC utility to do its task. But sometimes users report DISM error 0x8000ffff, 0x800f0954, 0x800f081f: The Source File Couldn’t be Found
Error 0x800f081f, The source files could be found. Use the “Source” option to specify the location of the files that are required to restore the feature.
This error message clearly states DISM was unable to repair your windows image because the files required to fix the Windows Image is missing from the source. If you are also struggling with similar problem, here is how to get rid of DISM error 0x800f081f in Windows 10.
Fix DISM error 0x8000ffff Windows 10
Third-party antivirus programs that you use on your PC is often responsible for various issues. In some cases, These programs can interfere in any critical operation. Then, You may get various error messages. So, When DISM failed error appears on your PC, you should disable any antivirus or security programs. If possible, Uninstall them temporarily. Then, Run the DISM command again. It may fix your problem.
Try to run the DISM command on a clean boot state that helps if any service conflict causing the issue.
Make sure you have a stable internet connection while running the DISM command.
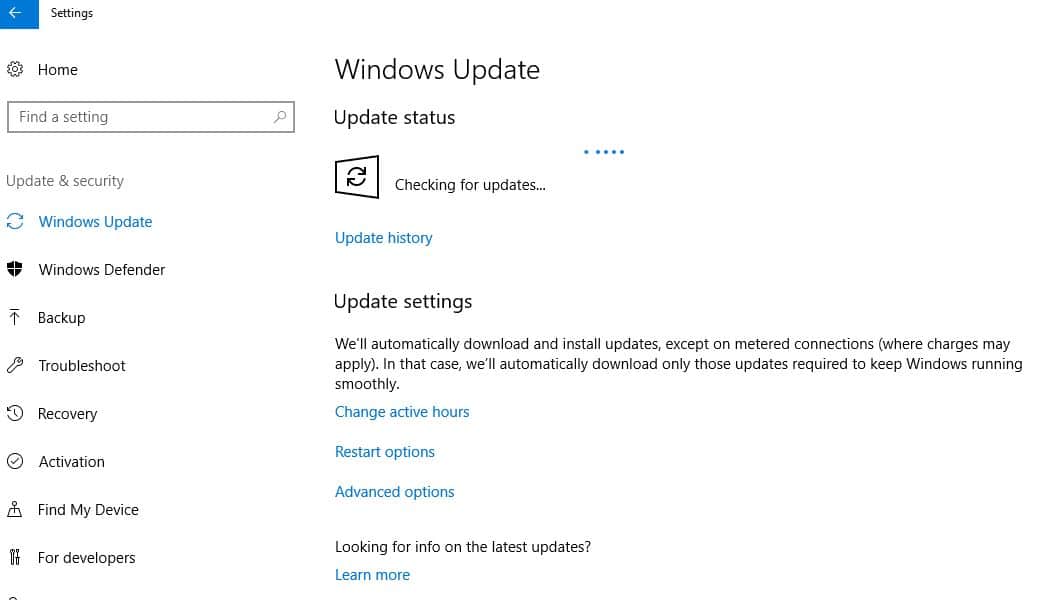
Also, we recommend to install the latest Windows updates, then run the DISM command.
- Press Windows + I keyboard shortcut to open the settings app,
- Click update & security than Windows update,
- click on check for updates
- let download and install the latest windows updates if available,
- Restart your system to apply the update,
- Now run DISM restorehealth command and check if there is no more error.

Clean up System Image Components
Refreshing the DISM tool and also cleaning up the image components can help you to get rid of various problems.
- Open the command prompt as administrator,
- Then perform the command below one by one.
- These will refresh this tool and also clean the system image components.
dism.exe /image:C: /cleanup-image /revertpendingactions
dism /online /Cleanup-Image /StartComponentCleanup
- Now, Wait for a few minutes until it finishes the process.
- Restart your computer and try to run the DISM command again. I hope, This time, You won’t get any error.
- If the problem still bugs you, you also can try the following command.
Dism.exe /online /Cleanup-Image /StartComponentCleanup /ResetBase
Hopefully, This method will fix DISM fails error on your computer. If not, you can try some other additional solutions.
Specify the correct location of Install.wim file
When DISM says it can’t find the source file, you will have to specify the correct location of install.wim file. In this case, You will need a bootable Windows 10 disk/flash drive or at least the Windows 10 ISO file. Then, follow the instructions below.
- At first, Insert the bootable windows media in your PC. If you have an ISO file, right-click on it and choose Mount. It will create an additional drive containing Windows installation files that you can find in this PC. Just, Remember the drive letter.
- Then, open the command prompt as administrator, type the following command and hit enter.
DISM /Online /Cleanup-Image /RestoreHealth /source:WIM:X:\Sources\Install.wim:1 /LimitAccess
Note: Replace X: with the drive letter of your Windows bootable disk.
Wait for a few minutes to complete the operation. I hope it will fix DISM errors 0x8000ffff, 0x800f0954, 0x800f081f: The Source File Couldn’t be Found.
Copy Install.wim
If the above solution fails, You will just need to copy the install.wim file from Windows bootable media to the local disk C. To do it, Follow these things.
- At first, Insert the installation disk into your PC or mount the ISO file like before. You will find this file in the sources folder.
- Then, Locate and copy install.wim file and paste it in local disk C.
- Now, Run the DISM command. Make sure to replace the source file location. For example, Use “DISM /Online /Cleanup-Image /RestoreHealth /source:WIM:C:\Install.wim:1 /LimitAccess” in case, you have copied the file to local disk C.
Hopefully, This time, You will not get any DISM errors.
Uncheck install.wim Read-Only
Sometimes, Users may encounter problems with the DISM command just because the install.wim is set to read-only mode. In this case, They must change it to fix the problem. To do it –
- Right-click on the install.wim file and go to properties,
- Then, Uncheck the read-only and save the settings.
- After that, Run the DISM command by specifying the source again.
Did these solutions help to fix DISM error on windows 10? Let us know on the comments below.
