How to Stop Windows 10 Changing Screen Resolution its own
Have you noticed Windows 10 screen resolution keeps changes automatically after sleep or after reboot? Here how to Stop Windows 10 from Changing Screen Resolution its own automatically

Sometimes you might experience suddenly Laptop Screen Turn dark and the screen resolution automatically switches to a different from the default one. Especially after installing the latest Windows update, the Screen Resolution changes automatically by itself or every time you log in to your PC. This is a common issue many Windows users report “while trying to change screen resolution on my PC away from the default resolution (1920×1080), after a few seconds it keeps changing back. And the primary reason for this problem would be the display (graphics) driver its outdated or not compatible with the current windows version. In addition, conflicting third-party software might adjust the resolution and this why screen resolution changes automatically on windows 10.
If you find that your screen resolution keeps changing automatically on its own, after sleep or after reboot, here are a few suggestions you can try:
Screen Resolution Changes Automatically
As an initial troubleshooting step, it’s suggested to download and install any pending updates that need to be installed on the computer through Windows update and check if it helps to resolve the issue.
- Open Settings app using Windows key + I,
- Go to Update & security than Windows update,
- Click Check for update button to allow download and install windows updates from Microsoft server,
- Once done restart your PC to apply then And check if the problem solved.
Again from Settings > System > Display, Make sure recommended settings are selected for Scale and Layout and Screen resolution.
Click on the Intel HD Graphics system tray icon > Select Graphics Options > Click on Balloon Notifications > Then, select Optimal Resolution Notifications > Then, click on Enable. Once you enable this setting, restart the computer once and check for the issue.
Clean Boot Windows
Conflicting third-party software can also be another factor behind the frequently changing resolution. So a clean boot, which starts Windows without superfluous startup programs and third-party services, might help fix the display resolution. Start Windows clean boot state and check if the problem persists or not.
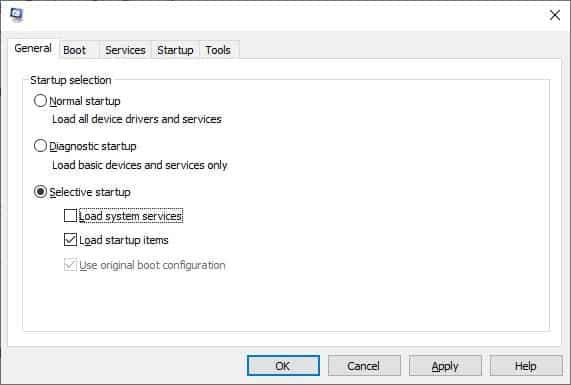
- Press Windows key + R, type msconfig and click ok to open System Configuration.
- Click the Selective startup radio button on the General tab.
- Deselect the Load startup items checkbox.
- Select the Load system services and Use original boot configuration options as shown directly below.

- Move to Services tab Click the Hide all Microsoft services option.
- Click Disable all button and Select Apply then ok button.
- Then select the Restart option on the System Configuration window that opens.
Update display driver
As discussed before this issue may arise due to the corruption in the drivers we need to focus on Display (Graphics) drivers that probably help fix the problem.
- Press Windows key + R, type devmgmt.msc and click ok
- This will open the device manager and display all installed device driver list,
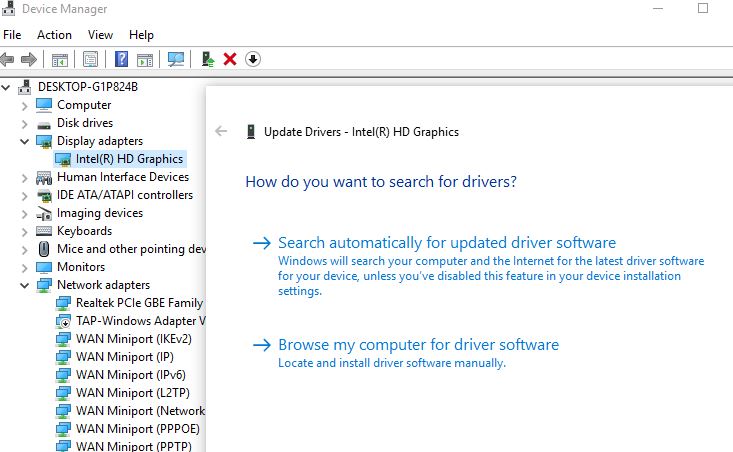
- Expand Display adapter, right-click on your graphic card and select “Update Driver Software.“
- Select “Search automatically for updated driver software” and let it finish the process.
- This will automatically download the compatible drivers and install them, once done you need to restart your PC to apply them.

Roll Back Graphics Card Driver Update
Some users have fixed variable resolutions in Windows by rolling back graphics card driver updates. If the problem started after the recent update there are chances the current display driver is not compatible with the current windows version. So reversing a recent graphics card update might also fix the issue on your desktop or laptop.
- Press the Windows key + R to launch Run.
- Then input ‘devmgmt.msc’ in Run and click OK to open Device Manager.
- Double-click Display adapters to expand that category.
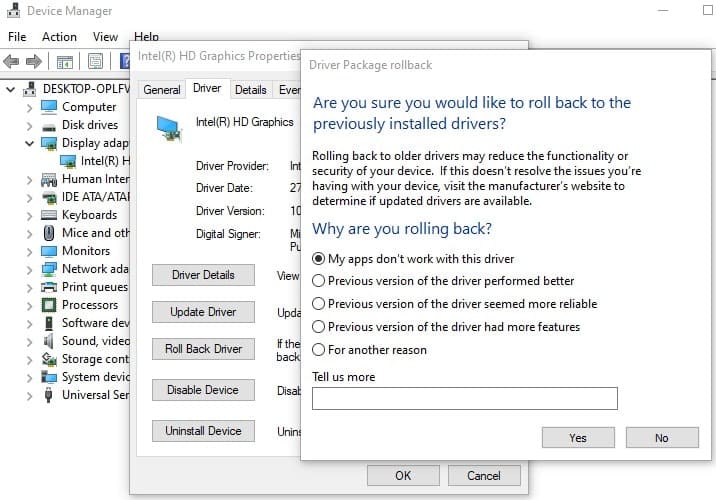
- Right-click your video card and select Properties to open the window in the image directly below.
- Then press the Roll Back Driver button on the Driver tab.
Note:- Rollback driver option only available if you have recently updated the graphics driver.

Reinstall the Graphics Card Driver
If the Roll Back Driver button is grayed out, you can still reinstall the video card driver. The graphics card driver might be corrupted, so reinstalling it is another potential fix. This is how you can reinstall a video card driver in Windows.
- Open the Device Manager window.
- Expand the Display adapters category.
- Right-click your video card and select the Uninstall device option.
- Checkmark Delete the driver software for this device option on the Uninstall Device dialog box./li>
- Press the Uninstall button.
- In the Action menu of Device manager, select “Scan for Hardware changes” option. This will cause the device driver to be reinstalled. Once the driver is installed, close all windows and restart the computer.
- However, if you prefer, you can still manually download the latest video card driver from the manufacturer’s website and install it as covered in this article.
Deselect the Base Video Option
The Base video option starts Windows in a minimal VGA graphics mode. That is certainly an option that can have an impact on your laptop’s or desktop’s resolution. Thus, deselecting the Base video setting is a potential fix for the display resolution. You can deselect the Base video setting as follows.
- Press Windows key + R, type msconfig and click the OK button.
- Then click the Boot tab on the System Configuration window.
- Deselect the Base video checkbox.
- Click on Apply and OK to close the window.
- Restart Windows after closing System Configuration. Now check if this helps fix the screen resolution issue.
Restore Windows to an Earlier Date
Still, need help? Restoring Windows to a previous date with System Restore will remove third-party software installed after a selected date that might conflict with the display resolution. Rolling Windows 10 back to a restore point might also roll back a video card driver update, which can also fix the changing display resolution.
- Press Windows + R, type Rrstrui and click ok
- The system restore wizard opens
- Select the Show more restore points checkbox so that the window includes all restore points.
- Select a listed restore point, and press the Next button.
- Press the Finish button to confirm your selected restore point and roll back the OS.
Those are some of the fixes users have fixed the display resolution with. In addition to those fixes, turning off the screen saver and fast startup mode might also resolve the issue.
