Sometimes you may need to connect your android smartphone on windows 10 to transfer files from your phone to a computer. This is simple and easy only you will need to connect the two devices through a USB cable. But there are just some instances when Windows 10 Doesn’t Recognize Android devices even when it’s already plugged in. There are many reasons you may encounter this problem such as a bad USB port, damaged cable, or software problems on either the phone or the computer system. Here in this post, we have simple workarounds you may apply if Windows 10 Doesn’t Recognize Android Device or Android USB is not detected but charging.
Android USB Device Not Recognized
- First of all, Make sure you’re using the original or OEM USB cable to connect your android to PC.
- Also, ensure no damage on the cable and that the USB port is functional. Or You can switch between USB ports to find out if other ports are working.
- And it’s also a good idea to reboot your device, that may fix if any temporary glitch causes the problem.
- Press and hold the Power button for a few seconds and then release it when the Power off menu appears.
- Tap Power off to turn the phone off.
- After 30 seconds, press and hold the Power button
- After your phone reboots, plug it back into the computer via USB and see if it’s already recognized.
Turn on USB Debugging

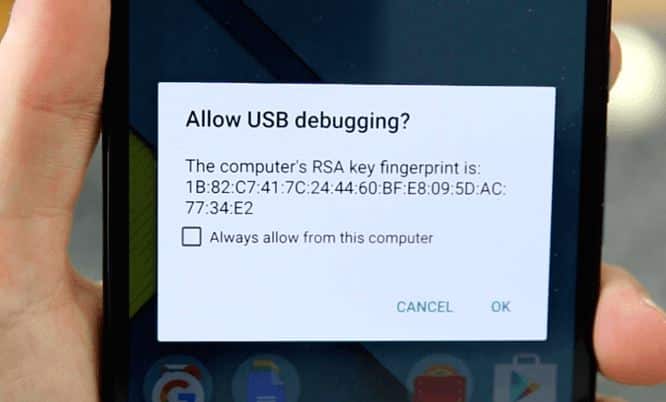
USB debugging mode allows your Android device to communicate with your Windows 10 PC. Check and make sure USB debugging mode is enabled on your Andriod device from Settings” > “About phone” > “Developer options“.
If Developer options is not available,
- Go to Apps-> Settings-> System-> About phone,
- then tap Build Number 7 times consecutively.
- Doing so will enable Developer options on the phone.
- After tapping on the Build number, tap the Back icon to head back to the Settings menu.
- You should then see Developer options in the menu options. Tap on it to continue.
- If necessary, tap the switch next to Developer options to enable the feature.
- Once enabled, tap to turn on USB debugging option on.
- If prompted, read the Allow USB debugging prompt, then tap OK to confirm.
That’s all Restart your phone then reattempt to connect to your Windows 10 PC through USB cable.
Check USB Computer Connection Settings
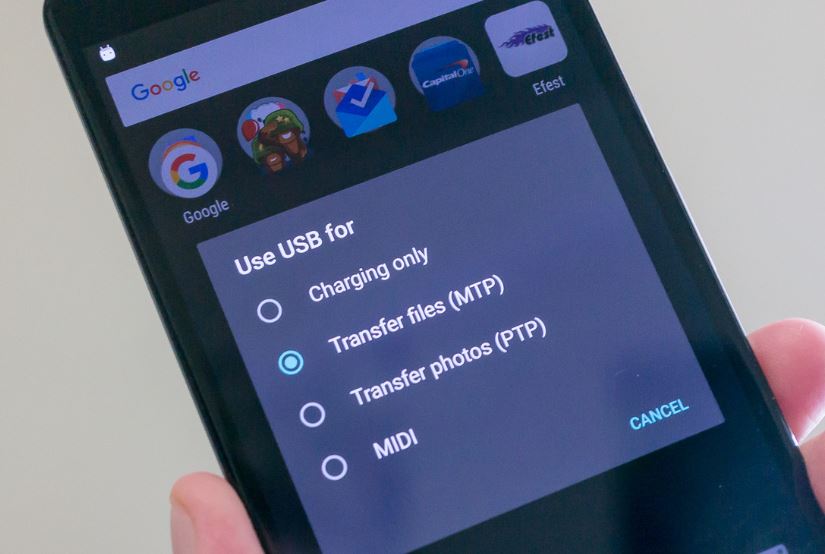
In order to connect and manage Android phone files on your computer, you need to connect your Android phone as a media device (MTP).

If not You can change this setting on Android devices by following the steps below.
- on your Android device Go to “Settings”
- Click “Storage” and click the icon “More”
- select “USB computer connection”
- choose “Media device(MTP)”
now connect your Android to Windows 10 again, Check this time it get connected
Install the Correct USB Drivers
When you connect the Andriod device to Windows 10 computer via USB, your computer will automatically install the correct USB driver for your Android, so as to make the phone work properly on the computer. But sometimes, your computer may fail to do that. Hence, you should download and install the right USB driver manually to fix the issue that the computer doesn’t recognize the Android phone.
Also, you can try to reinstall the driver on your Windows 10 PC by following the steps below.
- First of all, connect your Phone to Windows 10 via USB cable
- Now open device manager using devmgmt.msc command.
- This will display all installed driver list, and your phone may be detected as an “MTP or “Unknown Device” under “Other Devices” or “Portable Devices“.
- Try right-clicking then selecting “Uninstall“.
- Restart windows Once the device is removed,
- Now disconnect and reconnect your phone and check if this helps.
Wipe cache partition on android
Sometimes Software problems can also be attributed to errant system cache. These are temporary system files that are stored in the cache partition. While they are beneficial in terms of multitasking, they can also cause problems especially when they become corrupted. To clear out corrupted system cache, wiping cache partition can help. Here’s how it’s done:
- Turn off your phone, pressing the power button.
- Then press and hold the Volume Down button and Power button simultaneously for about 3 seconds and then release both buttons when the Boot Options screen appears.
- Press the Volume Down button to scroll to and highlight Recovery then press Volume Up button to select. The phone will then show the startup logo followed by the Android recovery screen.
- Once you’re on the Android recovery screen, press and hold the Volume Up button for about 10 to 15 seconds.
- Then quickly press and release the Power button. The Android recovery screen with menu options will display.
- Press the Volume Down button to highlight wipe cache partition option.
- Then press the Power button to confirm the selection.
Allow your phone to reboot after wiping the cache partition and then re-attempt to connect it to your Windows PC.
Did these solutions help to fix Windows 10 Doesn’t Recognize Android Device? Let us know on the comments below.

