
If you notice Windows System not working properly, Freezes, Installed components are not working properly, While open applications getting different errors or even windows frequently crashes with different blue screen error. All these are symptoms of Windows System file corruption, may system files become corrupt, gone missing, or even have been changed by a software installation. And to handle these situations Windows includes a System file checker command utility that replaces incorrect, corrupted, changed, or damaged versions with the correct versions where possible.
What is system file checker Utility?
On Windows Computer System file checker is a command line utility (sfc /scannow) that will check for system file corruption. The SFC utility can be run either via Command Prompt or PowerShell, which scans the integrity of all protected operating system files and replaces incorrect, corrupted, changed, or damaged versions with the correct versions where possible.
This SFC utility was first introduced in Windows 98 and subsequent versions of Windows XP, Windows Vista, Windows 7, 8.1 and Windows 10 has this feature.
With Windows 10 Microsoft integrated System File Checker with Windows Resource Protection (WRP), which protects registry keys and folders as well as critical system files. So that If any changes are detected to a protected system file, the modified file is restored from a cached copy located in the ( %WinDir%\System32\dllcache) Windows folder itself.
How to Run system file checker on Windows 10
So whenever you notice System not running smoothly, through different error codes at startup, Stuck on a Black screen or Windows frequently Crashes with different Blue screen error the first thing you must run the System file checker.
Its always recommended Running System file checker with Administrative privileges is very effective.
- On the Start menu Search Type cmd, Right-click on Command prompt from Search results and select Run as administrator.
- Now type the command sfc /scannow and press enter key.
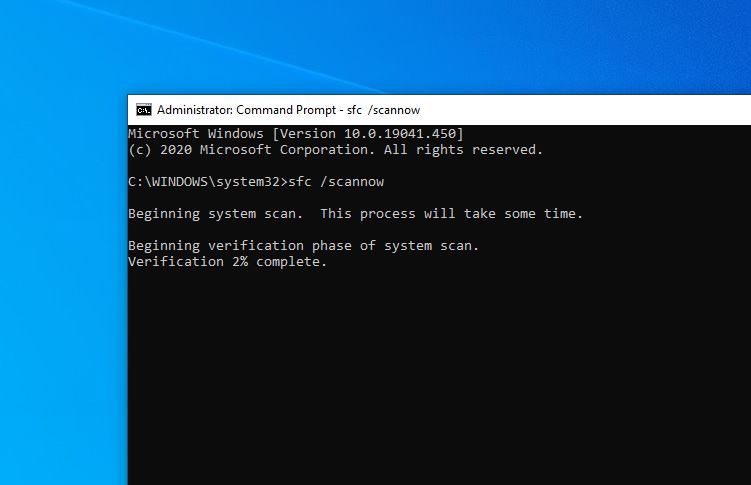
- This will begin the scanning process for all protected system files and replace corrupted files with a cached copy that is located in a compressed folder at %WinDir% \System32\dllcache.
Note: Here %WinDir% placeholder represents the Windows operating system folder. For example, C:\Windows.
- The above scanning process might take some time So, be patient and don’t close the command prompt.
What if SFC utility results Windows Resource Protection Could Not Start the Repair Service?
In case if running sfc /scannow command results, “Windows Resource Protection Could Not Start the Repair Service” error. This is because of its related services not running. That case
- Press Windows + R, type services.msc and ok.
- Here scroll down look for a service named background intelligent transfer service (BITS)
- Check and Make sure The status of this service should be set to Manual.
- Otherwise, double-click on it change the startup type manually and start the service.
- Now again run the sfc /scannow command, i am sure this time there is no more errors occur.
System file checker Scan results
Once the system file checker completes its job, you will see one of the following messages:
# Windows Resource Protection did not find any integrity violations
The above message indicates that there are no missing or corrupted system files on your PC.
# Windows Resource Protection could not perform the requested operation
If you get this message, you might need to run the System File Checker in Safe mode again. We recommend running System File Checker once again in normal mode before trying that in safe mode.
# Windows Resource Protection found corrupt files and successfully repaired them.
You will get the above message when System File Checker detected corrupt or missing files and managed to repair them without any issues.
# Windows Resource Protection found corrupt files but was unable to fix some of them.
If you get this message, you can either try running the System File Checker tool again or view the log file (%WinDir%LogsCBSCBS.log) and then manually replace corrupted files.
How to view the details of an SFC scan
The SFC scan results are stored on a CBS.Log file, If you are looking for View the details of the sfc scan results you need to make a readable copy on your desktop.
- open the Command prompt, Type the following command and press Enter
findstr /c:"[SR]" %windir%\Logs\CBS\CBS.log >"%userprofile%\Desktop\sfclogs.txt"

- This will create a sfclogs text document on the Desktop.
- Open the sfclogs.txt located on the desktop with Notepad.
- The file will contain all the details of the scanned system files and information for files that couldn’t be repaired.
That’s all about the Windows System file checker utility, So if for you SFC Utility scan results “Windows Resource Protection found corrupt files but was unable to fix some of them” that could be fixed by running DISM command dism/online/cleanup-image/restorehealth. You can read more about DISM command from here.