Wifi disappeared after latest windows 10 update? Lets fix it

Wifi short for Wireless Fidelity is a wireless technology used to connect computers, tablets, smartphones and other devices to the internet. That means devices with WiFi Technology enabled, can connect to a wireless network and access the internet. well, Saved WiFi networks connect automatically whenever your device in range and you won’t need to put any effort or add credentials agian to connect to the saved network. However, some users report Wifi disappeared after Windows update or WiFi Not Showing Up In Windows 10. It could be because of outdated network driver, incorrect network settings or temporary glitches causing the issue. Here this post we have some working solutions, apply to fix WiFi Not Showing Up or missing after Windows update.
Wifi missing after the Windows update
Restart your computer and network devices include the router and modem. Yes, this is the first and most working solution, help most users to fix the different problems with wifi network on Windows 10.
- Let’s restart your Windows 10 PC from the start menu – > Power – > Restart.
- Also, power off and on your router and modem, this will clear temporary glitches that might be causing the issue.
- After the restart, check if you can see the WiFi network you wish to connect to.
Press the Windows key + L; this will lock your PC. Now, click on the WiFi symbol on the locked screen and check if the network shows up or not.
Make sure Wifi is Enabled
Press the Wi-Fi physical switch available on your laptop, This will enable WiFi on your device.
- Press Windows key + I to open settings,
- Go to Network & Internet then Click on the Wi-Fi in the left panel of the window.
- Here check the WiFi switch is on, If not toggle the switch below the Wi-Fi to turn it on.
Also, you enable WiFi from network settings:
- Press Windows key + R, type ncpa.cpl and click ok
- Here locate the WiFi network, right-click on it select enable.
Now check if you can see the WiFi network you wish to connect to.
Run Network Troubleshooters
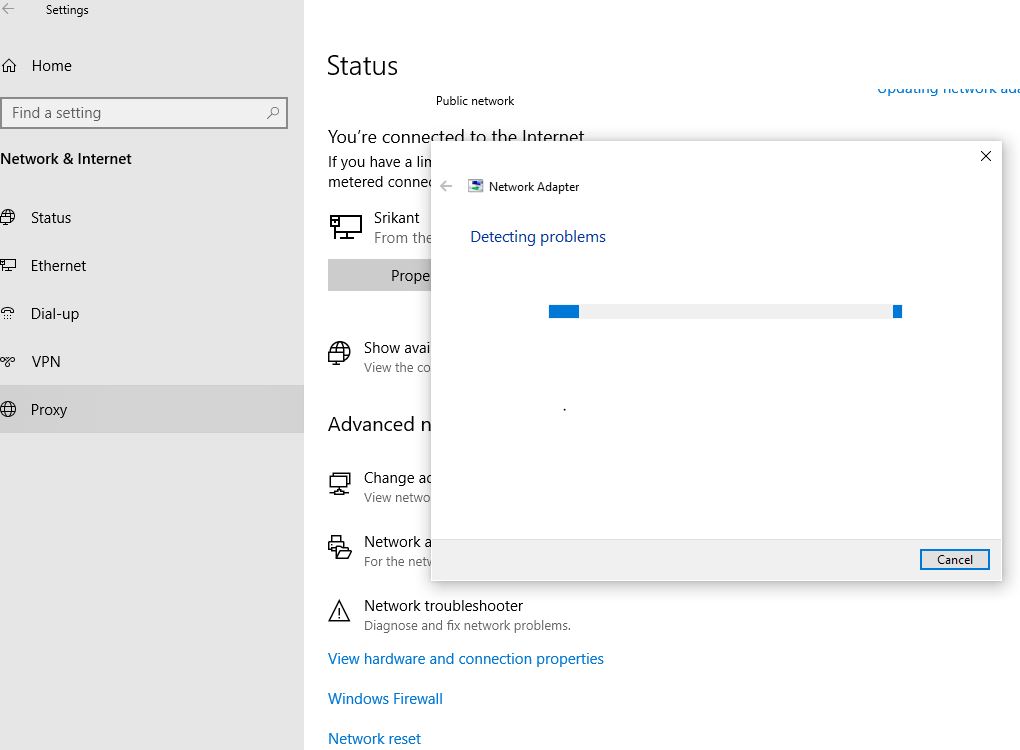
Run the built-in network troubleshooter that automatically detect and fix problems that might disabled the WiFi adapter on your laptop or PC.
- Open settings using windows key + I
- Go to Network & Internet, scroll down and click on Network Troubleshooter under Advanced network settings.
- Let Windows run the troubleshooter.

Check WLAN AutoConfig Service status
- Press Windows key + S, type services.msc and select the first result,
- This will open the windows service console,
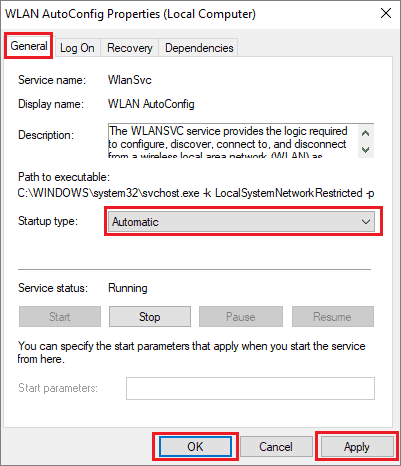
- Scroll down and locate the WLAN AutoConfig service double-click on it to open its Properties dialog box
- Change the Startup type to Automatic and If the service is not running, click on the Start button
- Click on Apply and OK to save the changes.

Install latest windows update
The latest windows update bring security patches and bundle the driver update as well. If an outdated wireless driver causing the issue then installing the latest windows update fix the problem for you.
- Open the Settings app and click on Update & Security.
- Click on the Check for updates button.
- This will download and install the latest available Windows updates.
- Restart your PC to apply the changes and check the WiFi status.
Pro tip: You can connect to the internet using the Ethernet cable for downloading the update.
Update WiFi Network Driver
If Windows update didn’t update the Wi-Fi driver, you could do so manually.
- Press Windows key + X and click on Device Manager
- Expand the Network adapters section, right-click on the wireless network driver and select Update driver from the context menu
- You can then follow the instructions on your screen to complete the update process.
Turn On Network Discovery
- Open the control panel, then click on the Network and Internet section (Make sure the View by option is selected to Category)
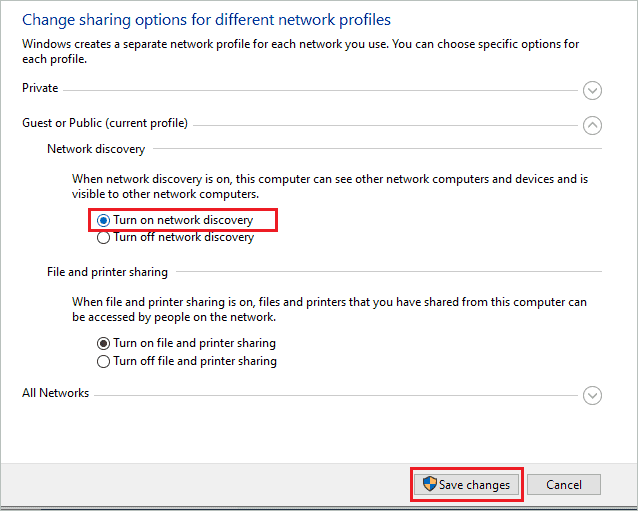
- Next click on Network and Sharing Center, and from the left panel of the window, click on the Change Advanced Sharing Settings.
- Select Turn on Network Discovery and click on the Save Changes button

Note: If you are prompted to add an administrator password, enter it and click OK.
Reinstall Wireless Network Driver
If the WiFi is not showing up in Windows 10 because of temporary issues with the wireless network driver, you can try reinstalling it.
- Open Device Manager and expand Network adapters.
- Right-click on the wireless adapter and click on Uninstall device from the context menu.
- Click uninstall again if prompt for confirmation and restart your compter.
- Again open device manager, and click on Action in the menu bar.
- Click on Scan for hardware changes to reinstall the driver.
- After the driver is reinstalled, check if you can see the WiFi network you wish to connect to.
