5 solutions to fix Netflix app not working on windows 10

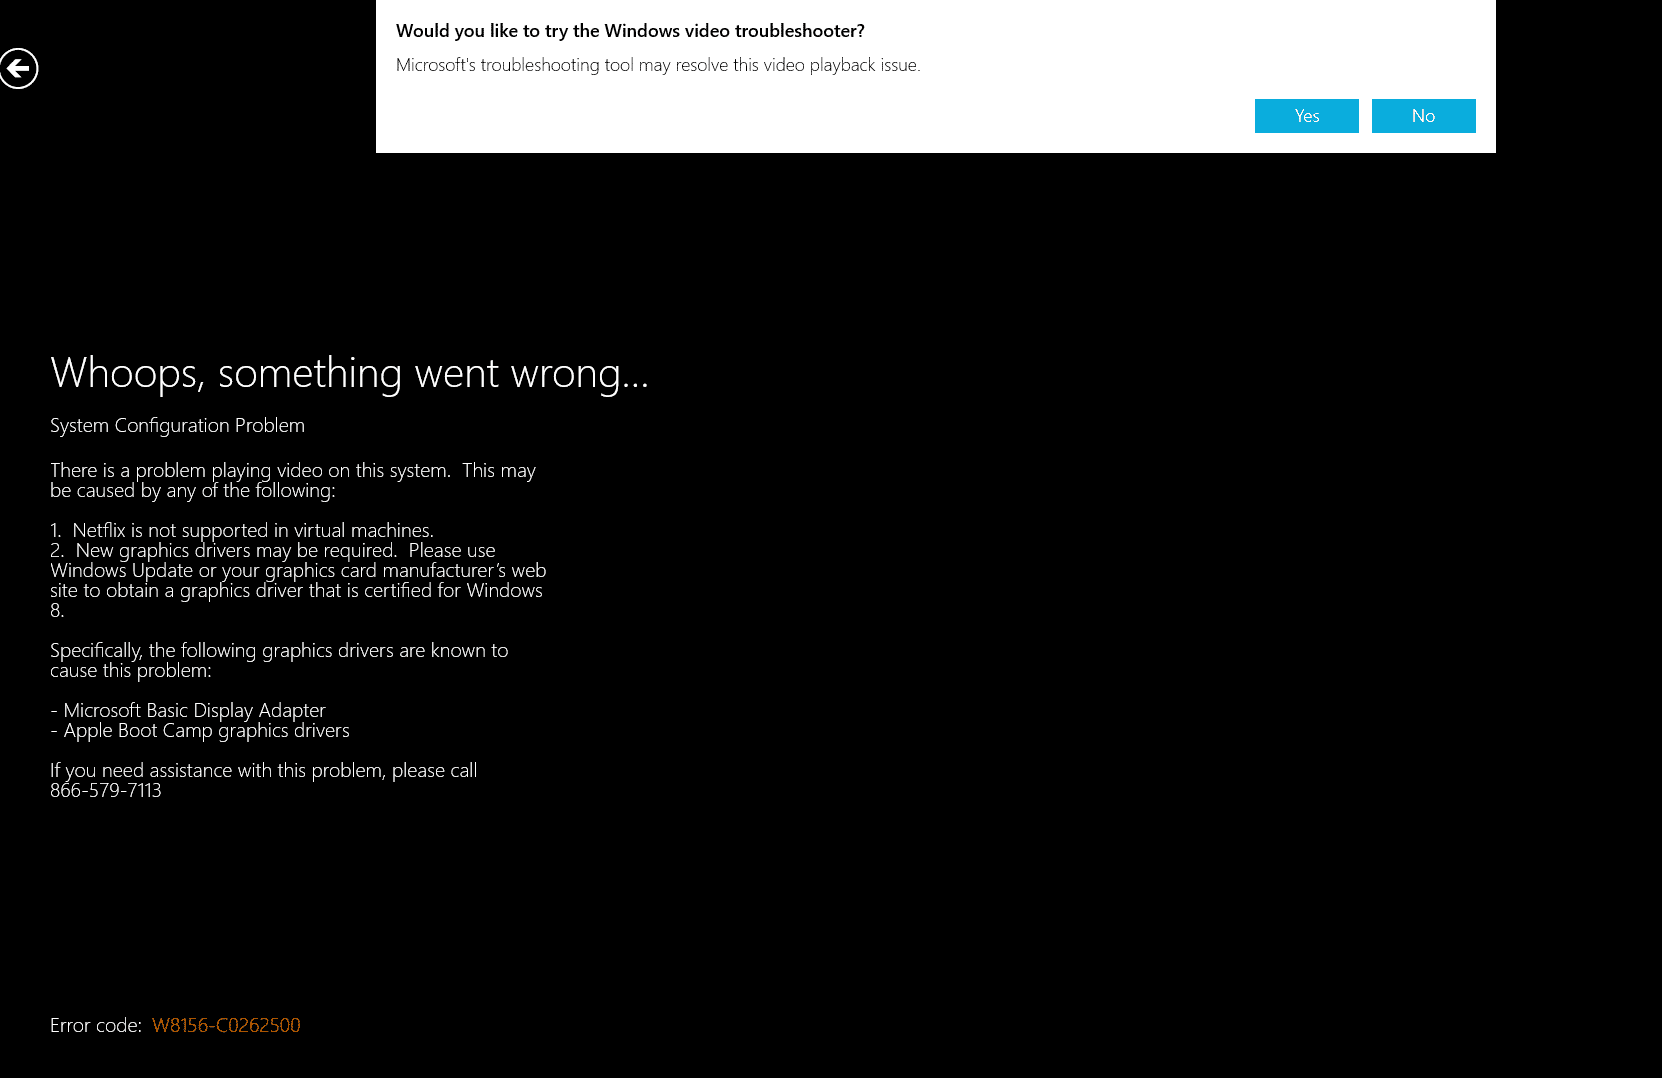
Did you experience the Netflix app not working on Windows 10? Netflix app stopped working, there is no sound, or it’s a black screen when you start playing a video. Or Netflix app failed to open with different Errors like There is a problem connecting, Netflix app Stuck on the loading screen, An error occurred loading this content, System configuration error, while open the app loads for a few seconds and then simply closes. Also, users report Netflix works on google chrome and internet explorer but not the app at all. keeps getting the error message,
System Configuration Error
There is a problem with the Windows media element that is preventing playback. Please make sure you have the latest Windows Updates and Video Drivers installed.
Fix Netflix app not working on windows 10
This problem can cause due to multiple reasons such as with App cache, incorrect network configuration, outdated device driver, Security software, or buggy windows update. So, first of all, check and make sure You have a stable internet connection, System Date and Time settings are correct, your device has installed the latest Windows Updates. Or you can check and install them from settings -> update & security -> windows update -> check for updates. Also, suggest you update your graphics card drivers and check if it helps.
You can update drivers from the Device Manager.
- Right-click on the start button and click on Device manager.
- Select Display Drivers.
- Right-click on the Display drivers and select Properties.
- Click on the device tab and select Update Driver.
Also if you are able to open Netflix then Sign in to your Netflix account, go to “Your Account & Help“, (top right-hand corner) then scroll down till you see either “Watching Instantly on Your TV or Computer” or “Manage Video Quality“, the latter is what you want, change your video quality to “Good“.
While running Netflix, right-click the control bar and deselect/switch off the “Allow HD” feature.
If you are getting Netflix Error O7363-1260-00000024 on your Windows 10 computer, This code indicates that you need to clear the information that the browser has stored from the media streaming website. So, you will have to delete the cookies from Netflix to fix this issue. That causes a run system optimizer like Ccleaner to clear browser cache, cookies, browser history, and more with one click. Restart windows and check this helpful.
Temporarily disable Security software (Antivirus) if installed and Perform Windows 10 clean boot, to check and make sure any third-party application not causing the issue.
Reset the Netflix Windows app
If the above solutions didn’t fix the problem, let’s Reset the Netflix Windows app to its default setup, which may fix the problem if any incorrect setup causing the issue.
Note: After resetting the app You may have to sign-in again after the reset.
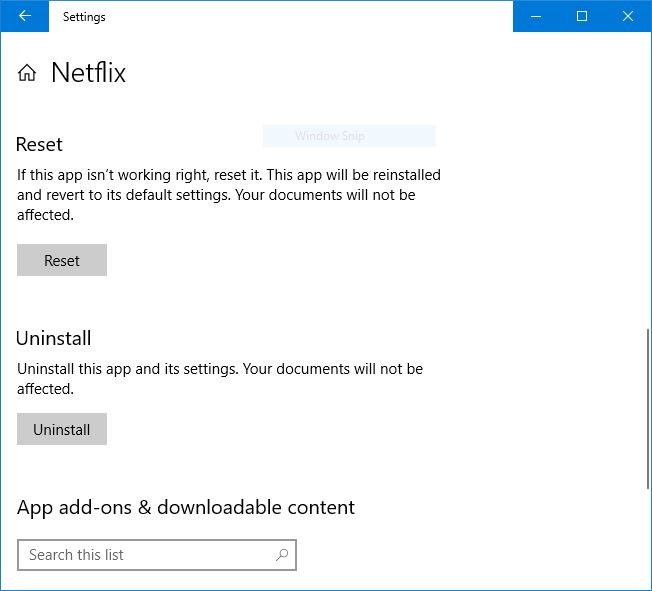
To Reset Netflix app Open Settings > Apps > Apps & Features. Scroll to find the Netflix Apps. Here Select the Netflix app, and click on the Advanced options. Find the Reset section and click on Reset.

Restart windows and try to open the Netflix app. If this doesn’t work, uninstall the App, and reinstall it. This will fix most Netflix app-related problems.
Flush DNS and reset TCP/IP
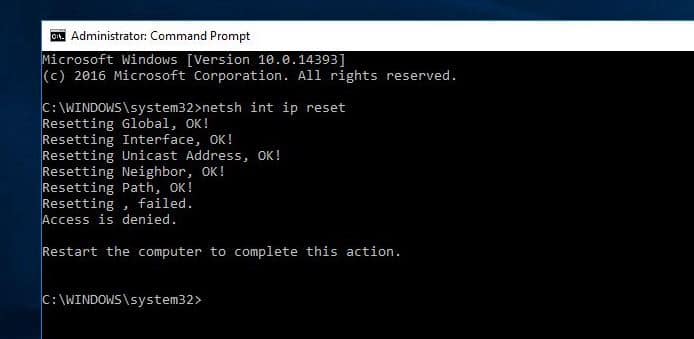
If incorrect network configuration causing the issue, try to flush the current DNS cache and reset the TCP/IP stack that mostly fixes every windows 10 network and internet-related problems include Netflix app connection problems. To perform this open command prompt as administrator then perform the command below:
netsh int ip reset
ipconfig /flushdns

Change DNS Settings
Changing the DNS address or flush DNS cache helps them to fix Netflix streaming error u7353 etc. To change DNS Address
- Open RUN by pressing Win + R.
- Type ncpa.cpl and press enter.
- Now, Right click on your connection and go to properties.
- Double click on Internet Protocol Version 4 (TCP/IPv4).
- Now, Change and set your DNS as 8.8.8.8 or 8.8.4.4 (Google DNS).
- Tick mark on Validate Settings upon exit
- Click ok to make save changes.
Deleting the mspr.hds file
This file is used by Microsoft PlayReady, which is a Digital Rights Management (DRM) program that most online video streaming services use (including Netflix). Deleting the mspr.hds file will force Windows to create a new clean one which will eliminate any errors caused by corruption.
- Press Windows key + E to open up File Explorer.
- Access your Windows drive (usually, it’s C:).
- Access the search box in the top-right corner of the screen, type mspr.hds, and hit Enter to commence the search.
- Wait until the search is finished, then select all mspr.hds occurrences, right-click on one of them and select Delete.
- Reboot your computer, try Netflix again and see if you managed to resolve the U7363-1261-8004B82E error code.
Install the latest version of Silverlight
Netflix uses Silverlight to stream videos in Windows 10. You can download it manually from the Microsoft website, and install it. Normally, Microsoft Silverlight should automatically get updated to the latest version via WU (Windows Update). However, since the update is not considered important, Windows might prioritize other updates first. Manually download & install the latest Microsoft Silverlight version from (here). Restart windows and check this mostly helps to fix Netflix error code U7363-1261-8004B82E.
Did these solutions help to fix the “Netflix app not working windows 10”? Let us know which options work for you.

